What does it take to have a peaceful mind and what is stress in relation to students of architecture?
I recently had a workshop about stress and mindfulness at uni and I was wondering to myself, what is stress? What is it in terms of architecture and how can we minimise this?
Let me explain a little about stress first.
Stress comes in many different forms. We have different perspectives about what stress is and how one deals with it may be completely different to the next.
For us students it is probably that final presentation we have at the end of each semester. The build up and compilation of the works created within the whole semester and creating a giant, completely new project within a few weeks and making beautiful drawings and renders within this short period of time can be very stressful for many, including myself.
We have different levels of stress ranging from low, optimal to high. This is shaped in almost a bell curve and the optimal stress levels is in between high and low levels of stress.
Now this may seem obvious, as low levels of stress gets people in the mindset of "oh I have plenty of time! I don't need to do it all now." and procrastinate, procrastinate and never end up doing work. In contrary, those who have high levels of stress will be way too freaked out and think "I DON'T HAVE ENOUGH TIME TO FINISH EVERYTHING" and end up wasting time stressing and worrying, and end up having irrational thoughts and not doing work properly. This high level of stress for an extended period of time could also potentially be dangerous. Now how can stress be dangerous you ask? Because the chemicals produced within our bodies when stressed (or very stressed) become constant and the longer you are completely stress the longer your body needs to produce these chemicals. And then when you stop stressing, your body stops and runs out of energy to go back to normal.
You can think of this in a simple concept. Imagine you are on a set of stairs and you can't go backwards. Every time you get more stressed or the longer you are stressed, you walk up a step. When you stop stressing you have to jump off. The higher you walk the higher you have to fall. What happens when have to jump from a platform that is too high up? I'll let you answer that one.
Therefore, the optimal stress level would be ideally in between. You don't think that you have too much time and you aren't so stressed that you become irrational. We become much more productive with just small amounts of stress pumped into us.
It's best not to freak out, go outside take a walk or meditate to keep yourself in check. Watch a movie and take some time out to chill, we don't need to spend 24 hours on architecture, that will probably be less productive that you think.
Friday 27 November 2015
Friday 8 May 2015
Programs of not architecture
What type of programs should students learn in the field of architecture? Whilst architecture uses mainly the 3d modelling tools of Revit, AutoCad and Rhino etc, there are also other programs that we are able to learn and expand on. To get a better grasp of the broad spectrum of jobs and requirements that can be used within the field of architecture, you may want to specialise in something different from architectural design. Things such as visualisation can be what you are looking to do instead. Want to learn awesome renders and make super realistic spaces? Want to be able to walk through your spaces? Maybe you would like to learn programs such gaming platforms of Unity 5 or Unreal Engine 4 to create ultra realistic renders that can be played in real time and show them to your clients instead.
You can use animation programs such as Maya to create motion within the spaces. Maybe your buildings move or sway and you want to portray this in you presentation.
It is actually a good idea to branch out and look at different programs and platforms that are available for us to use as it may be useful in the future in creation.
I personally would like to learn Maya and Unity and begin my slow move out of only architecture and into a much broader range of systems. What would you do?
Sunday 18 January 2015
Feltbook
In preparation for a new year in uni I've decided to make a customised book myself rather than buying yet another set of sketchbooks and notebooks for uni.

Sheets of A4 white paper (or whatever is to your liking, this is for one double page)


I'm going to make myself a felt-backed book from a left over piece from the recycle store, the book will consist of blank and grid pages for the ease of sketching roughly-to-scale drawings quickly. So here's what you'll need if you want to make one too.
You will need:
Sheets of A4 white paper (or whatever is to your liking, this is for one double page)
Sheets of A4 grid paper (or whatever is to your liking, this is for one double page)
2x A4 card (thick paper)
Needle
Thread
Ruler/pen
Awl (or something similar, e.g. ice pick)
Glue
3mm Felt (or whatever backing desired)
Assemblage:
Step 1:
Fold all the sheets of paper in half.
Step 2:
Create groups signatures by putting 4 sheets of paper inside each other, alternating from blank to gridded paper each time, create as many signatures as you want your book to have.
Step 3:
Mark out on the spine of the first signature adding a mark every 30mm.
Step 4:
Put the first signature back in place and using a ruler or straight, flat object, place it straight up against the spines and mark a line down the stack of signatures following the markings on the first signature.
Step 5:
Open up one signature at a time and use the awl to poke holes through each marking, making sure to keep the stack in the same order as they were marked.
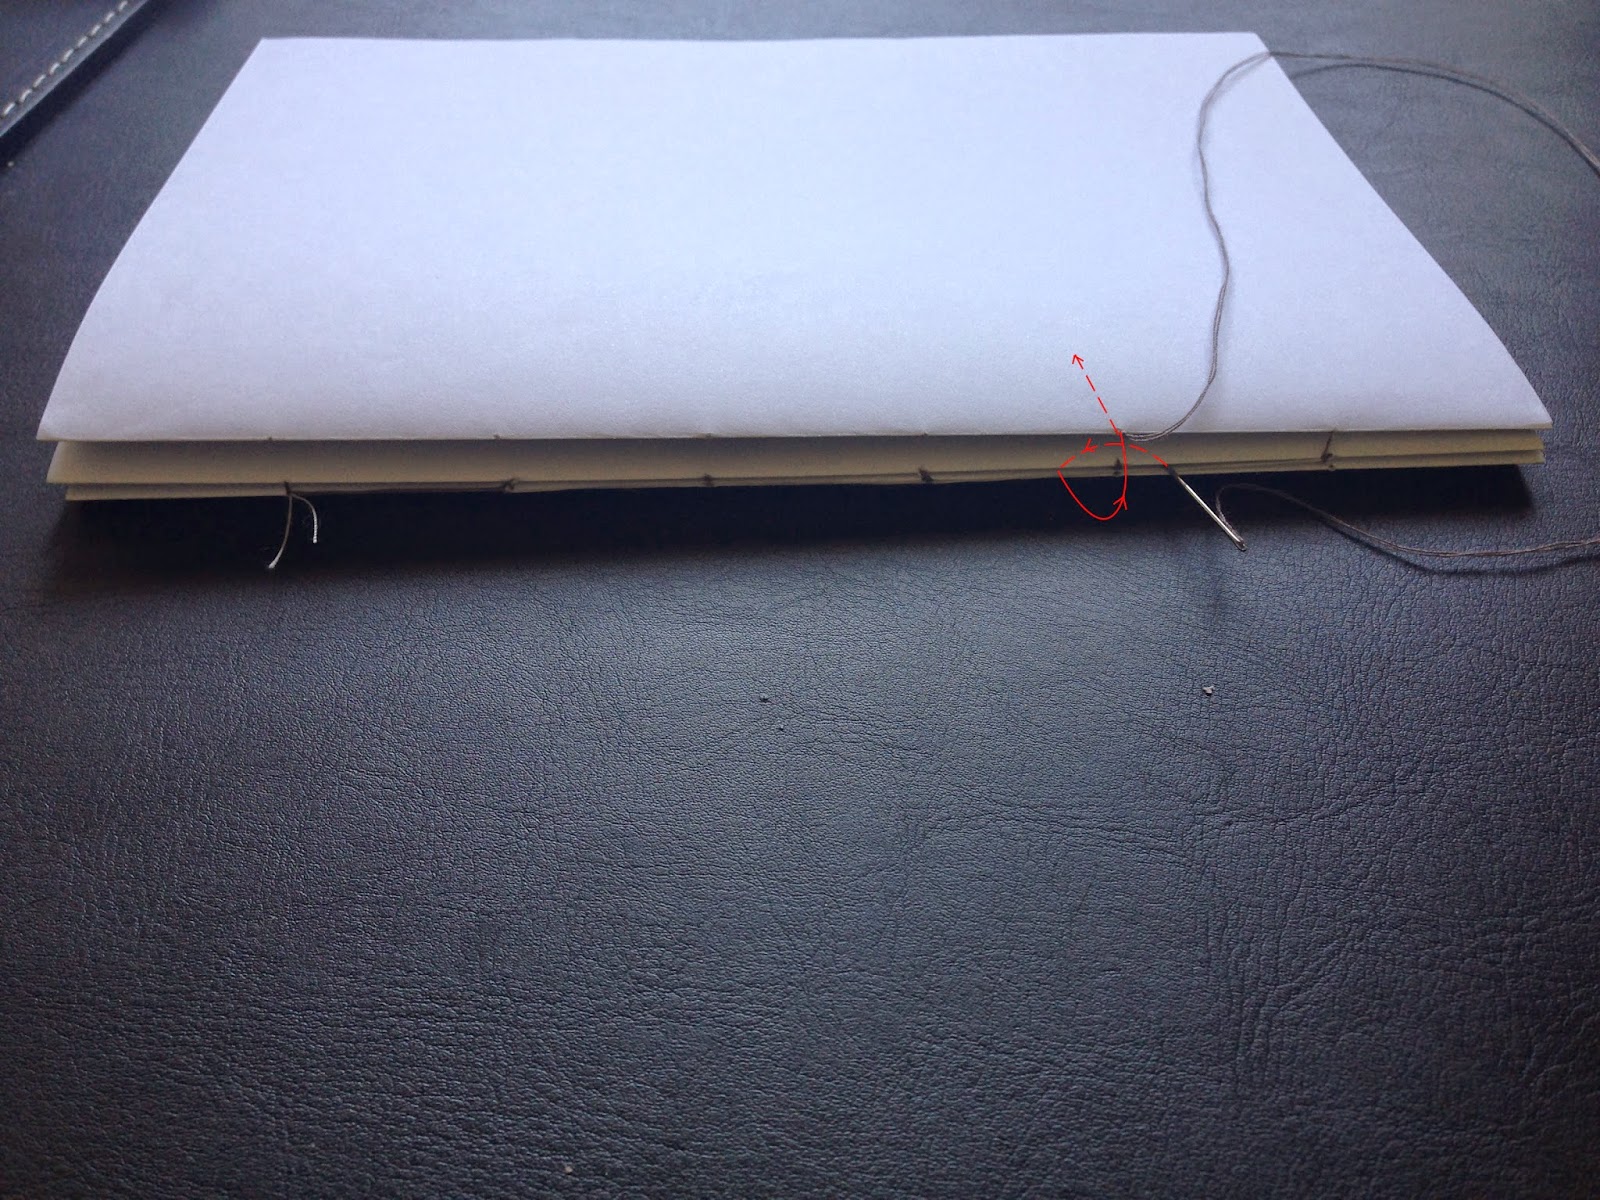
Step 6:
Double-thread and knot your needle and sew the first signature by weaving in and out of each hole, and weave back to the start.
Step 7:
Once you reach the start, loop under the seam and tie a knot, then go through the hole to bring the needle to the outside.
Step 8:
Add the next signature on top and go through the first hole, out the 2nd hole, down through the seam of the 1st signature on the right and coming back up through the seam on the left then back into the hole. Then go out through the 3rd hole. Repeat for the remaining holes to the end.
Step 9:
Add the next signature on top and go through the first hole, out the 2nd hole, loop around the back of the knot created by the stitches on the previous signature and then go back into the 2nd hole and then out through the 3rd. Repeat for the remaining holes to the end.
Step 10:
Repeat step 8 for the rest of the signatures until you get to the last signature.
Step 11:
On the last hole, loop under the thread and tie a knot, then go back through the hole to the outside and lightly pull the knot out as well.
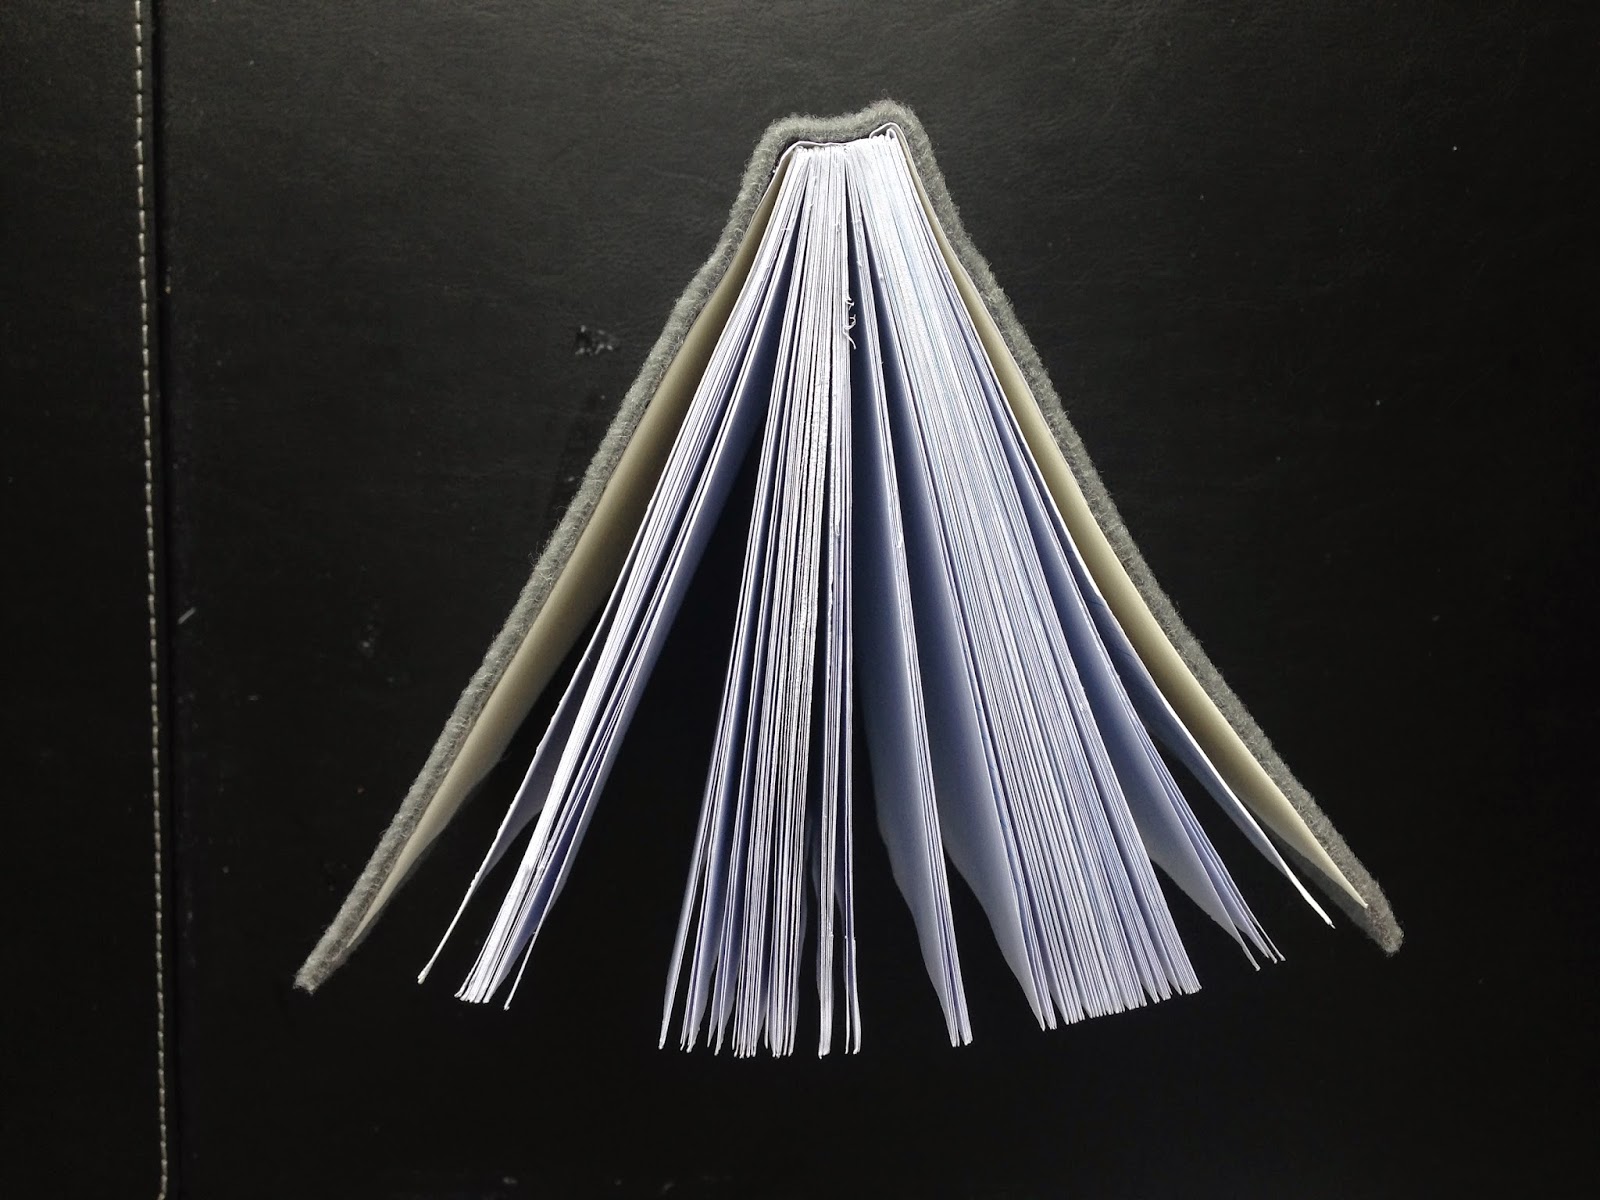
Step 12:
Add glue to the spine by holding the block in between a few heavy books, you may need large clips to hold the sides to keep the book in place while drying. Apply 2 layers of glue to the spine.
Step 13:
Fold the two sheets of card in half.
Step 14:
Once the glue has dried, apply a layer of glue on the front page and stick one sheet of the card on top. Repeat for the other side. Re-clip the spine to keep everything in place while it dries.
Step 15:
Cut a smaller piece of paper the same height and glue from the spine outwards for extra reinforcement.

Cut a smaller piece of paper the same height and glue from the spine outwards for extra reinforcement.
Measure the width of you book as well as the thickness of the spine to get the approx measurement for the amount of felt that needs to be cut. Cut out the felt to the height of the book.
If you want your cover to be slightly offset from the sides, be sure to add 10-15mm to the height and width of the felt.
Step 16:
Add glue to the front of the book and line it up with the felt. Press down onto the felt to glue it into place. Fold it over and glue the back of the book and press it down onto the felt.
If you want you cover to be slightly offset, make sure to glue the book 5-7mm offset on each side before pressing down into place.
Step 17:
Smooth out the cover and add clips to all sides or place in between some heavy books to hold the book in place while it dries.
And you're done! yaay!


Monday 12 January 2015
Who inspires?
The moment we stop breathing is the moment we, as individuals stop creating. But that doesn't inhibit another to use that as the drawing board for creation. That's right, what inspires us to create?
Everything.
Life, death, and everything in between.
But who is inspired?
What's the difference between a painter and a scientist? Not too much, except the rules and regulations of proving the hypothesis within an arbitrary experiment, that, if majority is accurate becomes fact, rather than just a drawing hung up in a room to be looked at.
But if you think about the basics of both a painter and a scientist, they both start from an idea, a thought, an inspiration that delves them into expanding on the thought and experimenting, on canvas or in a lab.
When we talk about inspiration there is no specific one place that we get inspired from. We inspire each other and the world.
I could be an architect, you could be a journalist, a doctor, a care bear maker, and yet we could all draw inspiration from the same place. From bone to building. From building to dress.
Amanda Luu, Shereen Amin
Subscribe to:
Posts (Atom)